

Intro
Hello, Chatters! I am There's so much exciting stuff happening in the world of AI, and trying to keep on top of everything as well as figuring out where the line between hype and real applications are is challenging. However, with the help of Uros (https://www.linkedin.com/in/pesicuros/), I've found some real use cases that I think you will enjoy. Just like with ChatGPT in Google Sheets, it's all about practical applications that you can use.
The title of the post will already give it away - I'm going to show you how you can use ChatGPT to create flowcharts, graphs, mindmaps and other similar ways to data visualization. I'll share some useful prompts, the different options available to you and different use cases of which I'm sure you'll find something that's applicable to you.
I've shared before that ChatGPT can write code, amongst other things. The key here is lightweight programming languages. Now don't worry - we don't need any prior knowledge or have anything installed.
All we need is:
- a browser
- access to ChatGPT
This allows us to quickly make:
- Presentations
- Flowcharts
- Mindmaps
- Gantt Charts
- Class diagrams
- Pie charts
- Bar charts
The key to all this is ChatGPT's ability to write out basic programming languages. There are tons of tools out there that allow you to use Lightweight markup languages, that can then be used to visualize - online, for free.
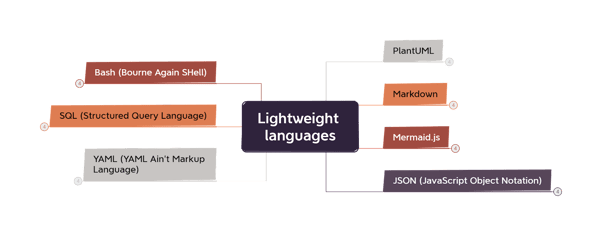
Let's dive in.
Markdown
First, let's start with a short explanation of what Markdown is. Markdown is a lightweight markup language that can be used to format text. It allows you to easily create headings, lists, bold and italic text, links, and more. The syntax is designed to be easy to read and write, even without special tools. ChatGPT can use markdown. Give it a try, tell it to write an article and use markdown to emphasize certain parts, or to use markdown for headers and it'll demonstrate it.
But we aren't all that interested in making ChatGPT's responses look nice. We want to use its ability to write it out!
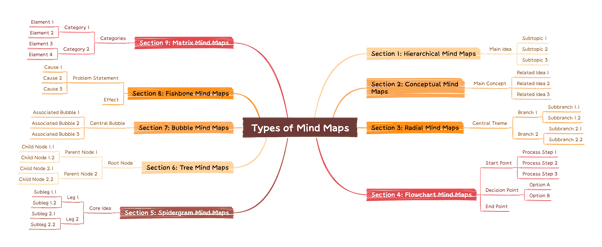
Let's start with a simple example and learn as we go. Let's go with a simple example: A mind map.
Go into ChatGPT, and tell it to create a mind map.
|
Create a mindmap For the following topic: Types of mindmaps. Use markdown. Do this in a code block |
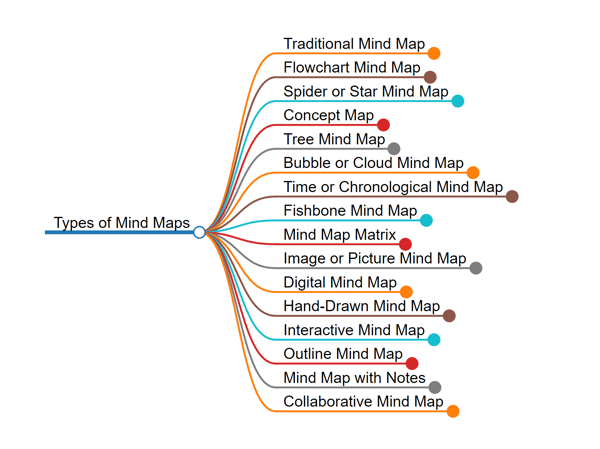
And as a result, you get something like this:
|
# Types of Mind Maps - **Traditional Mind Map** - Hierarchical structure - Central topic in the center - Branches radiating outward - **Flowchart Mind Map** - Sequential representation of processes - Boxes and arrows to depict steps and connections - Used for decision-making or project management - **Spider or Star Mind Map** - Central topic at the center - Branches radiating outward in a radial pattern - Used for brainstorming or capturing ideas - **Concept Map** - Focuses on relationships between concepts - Arrows or lines to show connections - Used for organizing and understanding complex ideas ... etc. |
Looks neat, but what now? Well, we can just copy and paste this into sites like:
And Boom!
You've got an interactive chart, ready to go. Want to use more of the features?
Copy and paste the example code on markmap.js, and tell ChatGPT to use it.
Want it to be more complete, more levels deep? Just tell ChatGPT and copy and paste!
TIP: Tell ChatGPT to use a code block!
Without a code block, ChatGPT will just make use of the markdown itself and show you the result with nice-looking headers, bold text, etc.
A list of tools to play with that support these languages
I played around with a whole bunch of different tools that can use this language. I can't go in-depth with all of them, but I can make a list to save you some work!
- Xmind - Great visuals, limited capabilities. Can import very basic Markdown, can create beautiful mindmaps, but limited in capabilities and flexibility. Also requires you to sign up and install https://xmind.app/
- Mermaid.js - very flexible, not the best visual option. Can be somewhat customized with some CSS but this can take trial and error
- Markmap.js - Very capable, amazing for web applications.
- PlantUML - Also very flexible, however, ChatGPT is prone to making errors once you try to create more complicated charts like Gantt - charts.
http://www.plantuml.com/plantuml/uml/
- Draw.io - Tool that can import and handle both PlantUML and Mermaid with some extra options. If you hit the little plus sign in the toolbar up top, and go to "advanced" you can import PlantUML and Mermaid.
Then there are lots of tools, editors, and programs that support Markdown - Slack, Trello, Notion, Mem.ai, Github, and a bunch more.
Practical use
Let's take a look at some more examples. Got a text describing a complicated process? You can use ChatGPT combined with one of the languages mentioned to create some great visuals!
Let's take a look at an example that would work with Mermaid.js
Mermaid, like PlantUML is very flexible and has some great use-cases? Because of its flexibility, we can use it to describe all kinds of processes. If we're diving trying to understand a complex topic, we can use these languages to visualize it and make it more clear to us. I recently discovered this paper called "Tree of thought" which is an approach to improve the problem solving capabilities for Large language models like ChatGPT. To try and make sense of it, I copied and pasted part of the paper into ChatGPT and told it to turn it into a graph in Mermaid. Just copied and pasted it in the online editor https://mermaid.live/
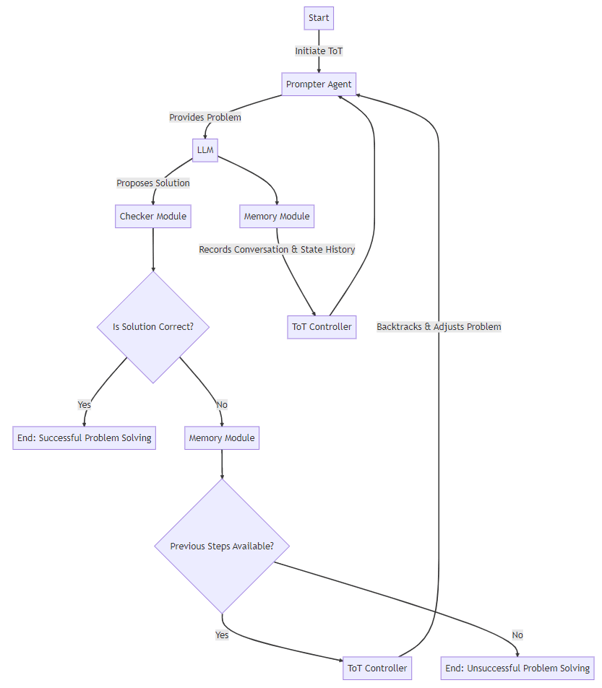
And now it's suddenly visualized in a way that's easier to understand. Still a little complicated? Tell ChatGPT to visualize an example usecase and it will do that for you. If you run into any errors, copy and paste them into ChatGPT and it will very likely be solved.
Create Presentations
Reveal.js is a framework we can use to create slides with HTML. It's another case where with some basic code you can create really pleasing visuals. It's a little bit more involved but very flexible, and can allow you to create some amazing presentations.
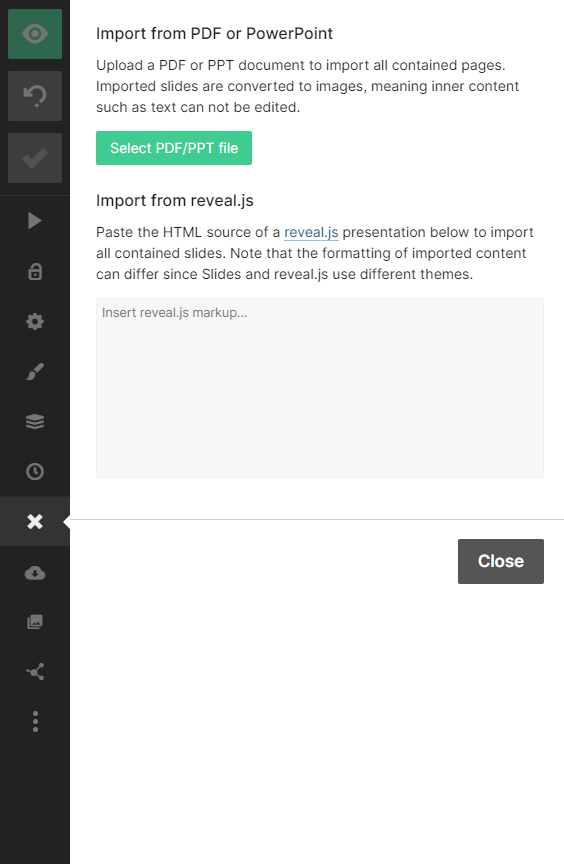
On https://slides.com/ you can sign up for a free account in your browser with some limited use.
Once you're there you can use the "import" option on the left side of the screen to copy and paste reveal.js markup and there you go! you can copy and paste slides with their content setup with ease.
The web version and the local version need a slightly different approach. You can use the same prompt I will share below, but in the web version you'll have to add <div class="slides"> before all the first slide, at the top and you can import the slides!
To create some beautiful presentations you can make use of the local version - for that all you need is a browser.
Here you can find the basic steps: https://revealjs.com/installation/#basic-setup
Once you have that, if you edit index.html, you can create some incredible slides.
Options for reveal.js are:
- Clean looking animations
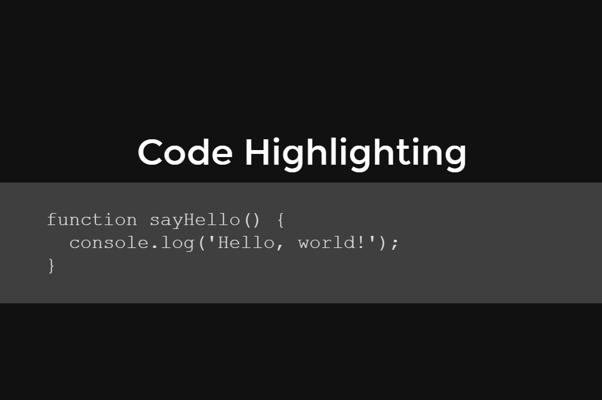
- Code blocks
- Background images
- CSS customizability
- Adapts to screen/resolution
- Slides within slides (nested slides)
You can do all of this with Notepad, copy and paste whatever you want in there.
For example, I told ChatGPT to create a few slides: Simply copy, paste and cut slides below <div class="slides"> to do so!
|
<section> <h2>Introduction to Reveal.js</h2> <p>Reveal.js is a framework for creating beautiful presentations using HTML.</p> <aside class="notes">This is the opening slide introducing Reveal.js.</aside> </section> <section> <h2>Features of Reveal.js</h2> <p class="fragment">Themable: Comes with a few themes, but you can also create your own.</p> <p class="fragment">Modular: Reveal.js has a rich API and supports plugins to extend its functionality.</p> <p class="fragment">Responsive: The presentations are flexible and adapt to different screen sizes.</p> <p class="fragment">Interactivity: Supports touch navigation, keyboard shortcuts for navigation and an interactive slide overview.</p> <aside class="notes">Here we will go over the main features of Reveal.js.</aside> </section> <section> <h2>Nested Slides in Reveal.js</h2> <section> <h3>First Nested Slide</h3> <p>This is an example of a nested slide in Reveal.js.</p> </section> <section> <h3>Second Nested Slide</h3> <p>You can create as many nested slides as you want!</p> </section> </section> |
TIP: use the following prompt to generate slides:
Your task is to generate slides for use in reveal.js. Make sure to utilize all its features. I only want slides in <section>, so no other html parts outside of it.
Please give some of these a try and let me know how it went. Enjoy!
For more from Sjoerd, check out his episode on "How to Talk to AI" with GodaGo his newsletter on how o Use AI.